Introduction
ilumr is a fully integrated magnetic resonance imaging (MRI) system that is designed to run nuclear magnetic resonance (NMR) and MRI experiments.
When unpacking, please identify all the following components:
The ilumr MRI System with Gradient and 11mm RF Probe installed
120W 24V DC Power Supply
Standard Kit
Sample Depth Gauge
Probe Insert for fastener removal
RF Probe Tuning Tool
15x 11mm Glass Tubes
5x Test Tube Lids
11mm Phantom Kit
11mm Shim Sample
6x 11mm Sample Holders
11mm Sample Grip
Optional 15mm Kit
15mm Air Vent Disk
15mm RF Probe
12x 15mm Glass Tubes
4x Test Tube Lids
15mm Shim Sample
6x 15mm Sample Holders
15mm Sample Grip
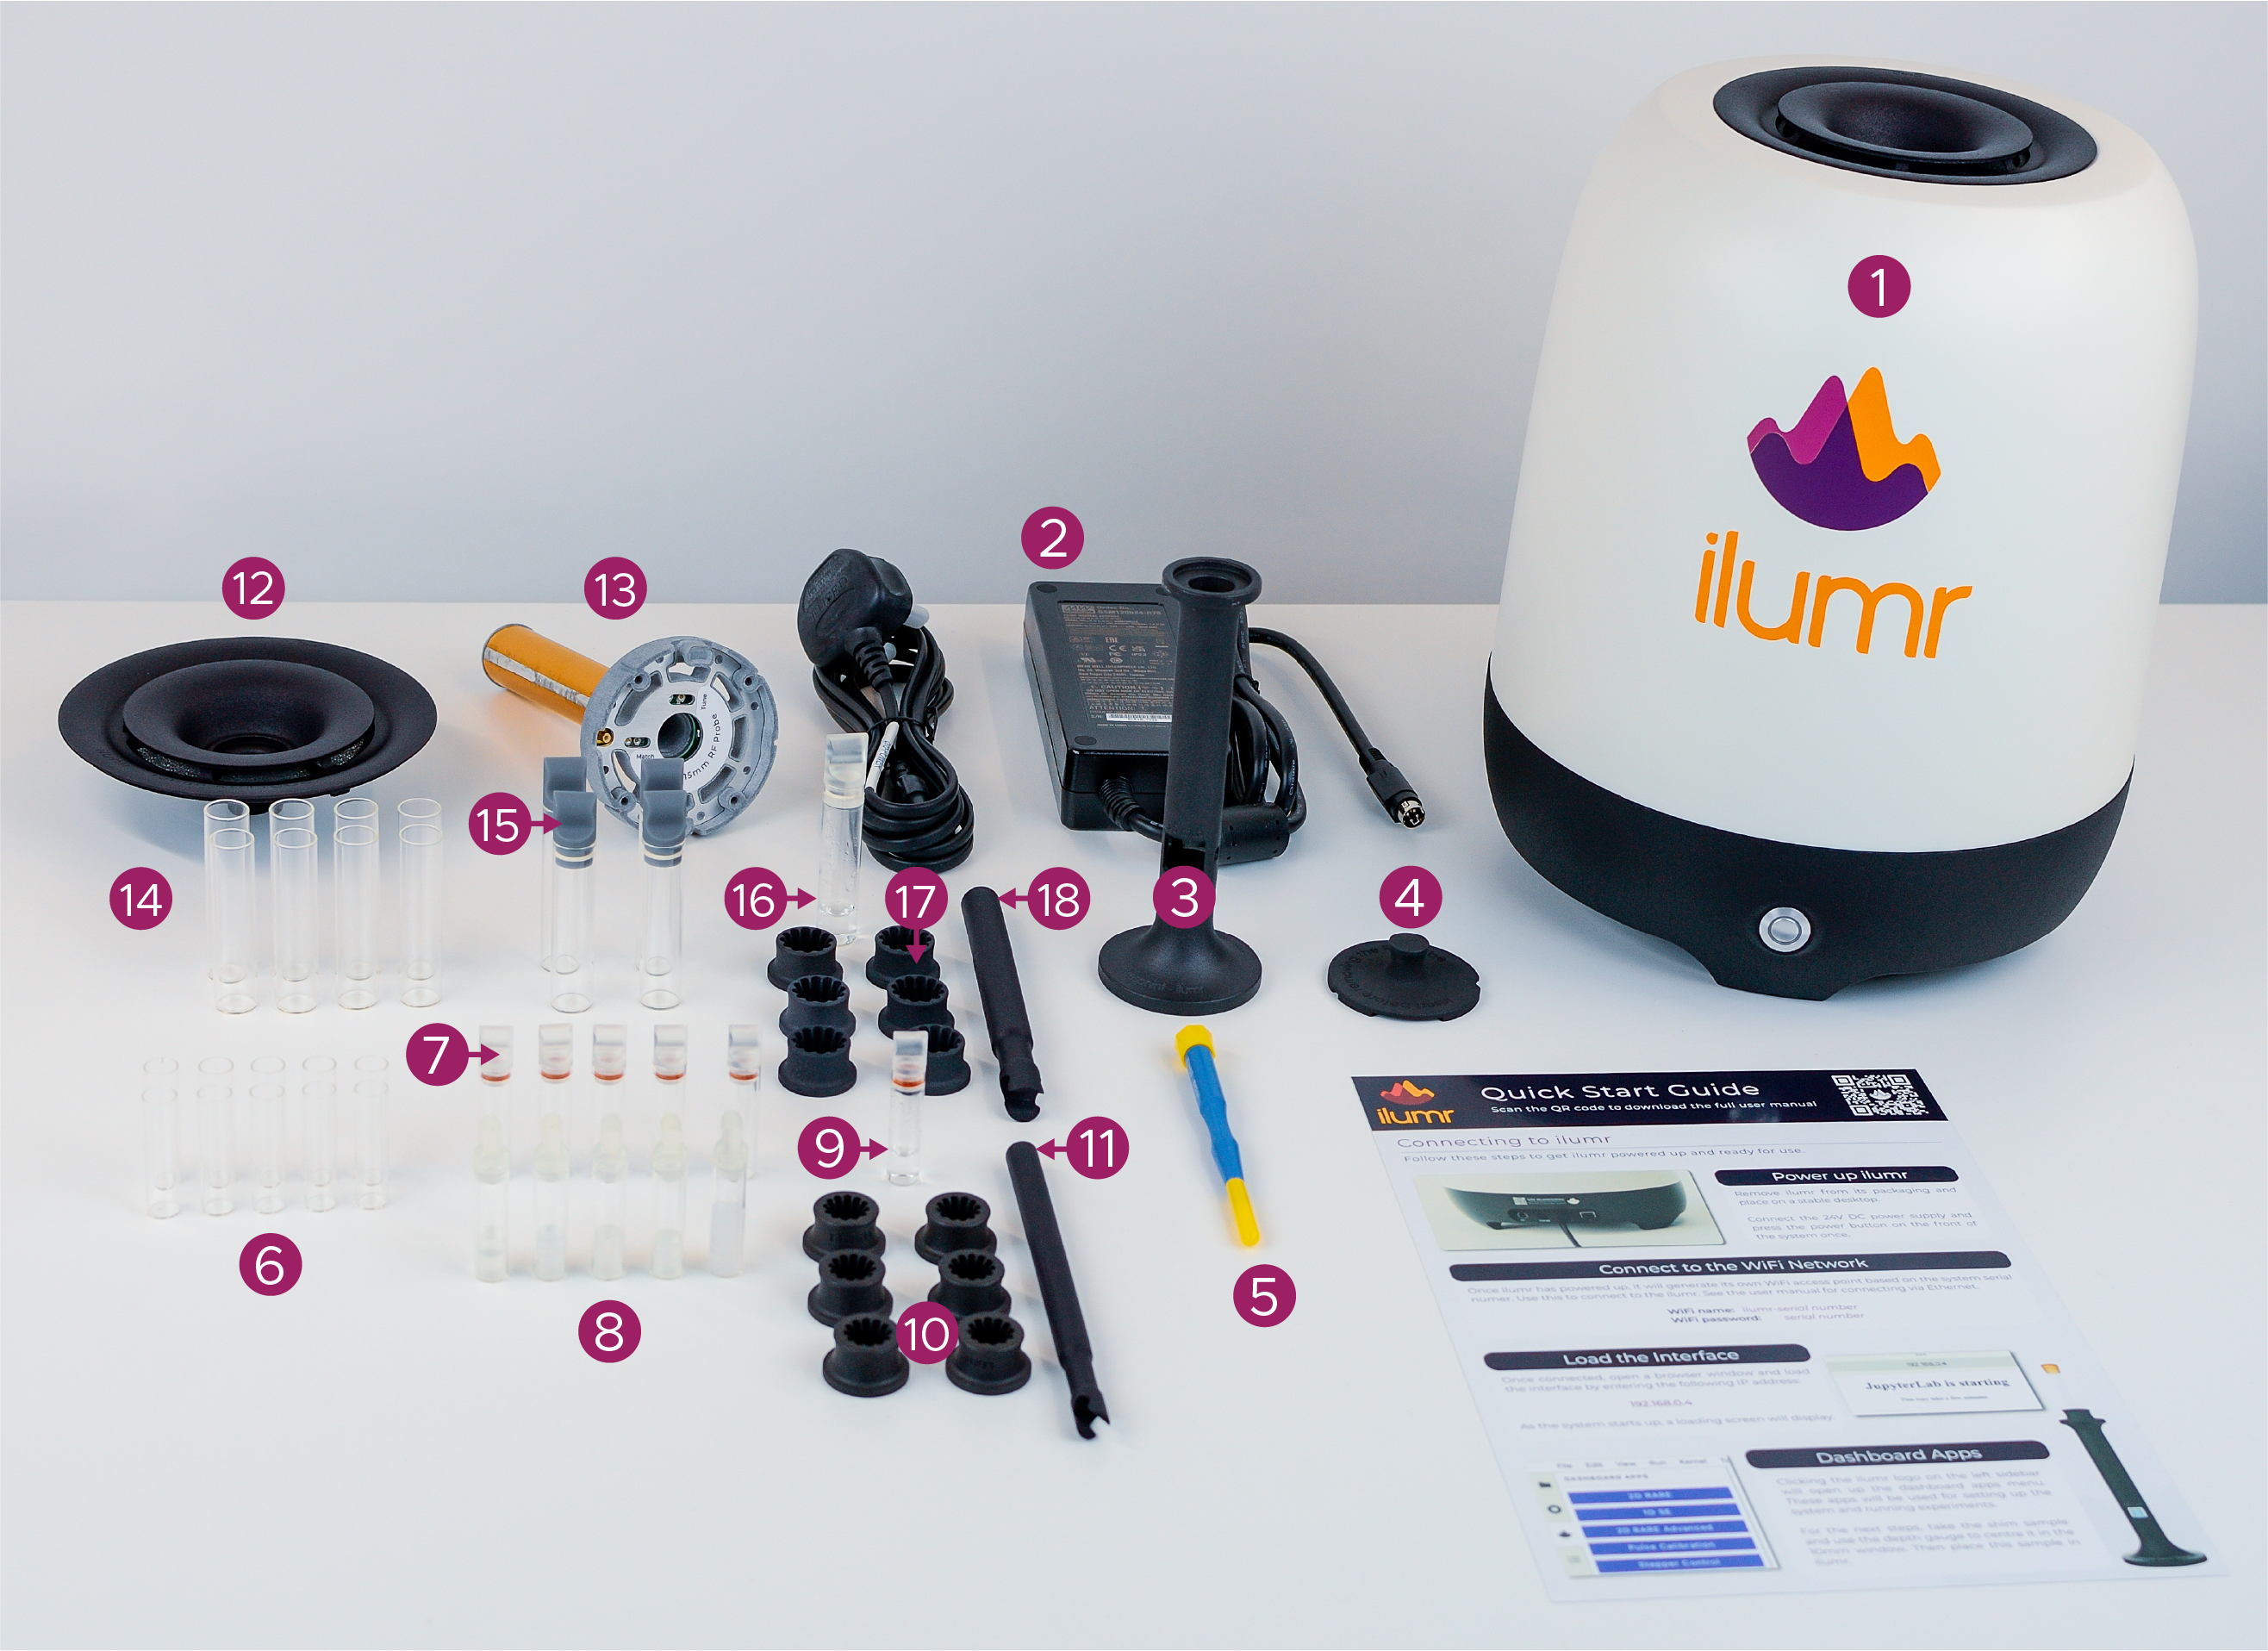
ilumr with Standard Kit and Optional 15mm Kit
System Overview
Front View
On the front of ilumr you will see a circular power button.
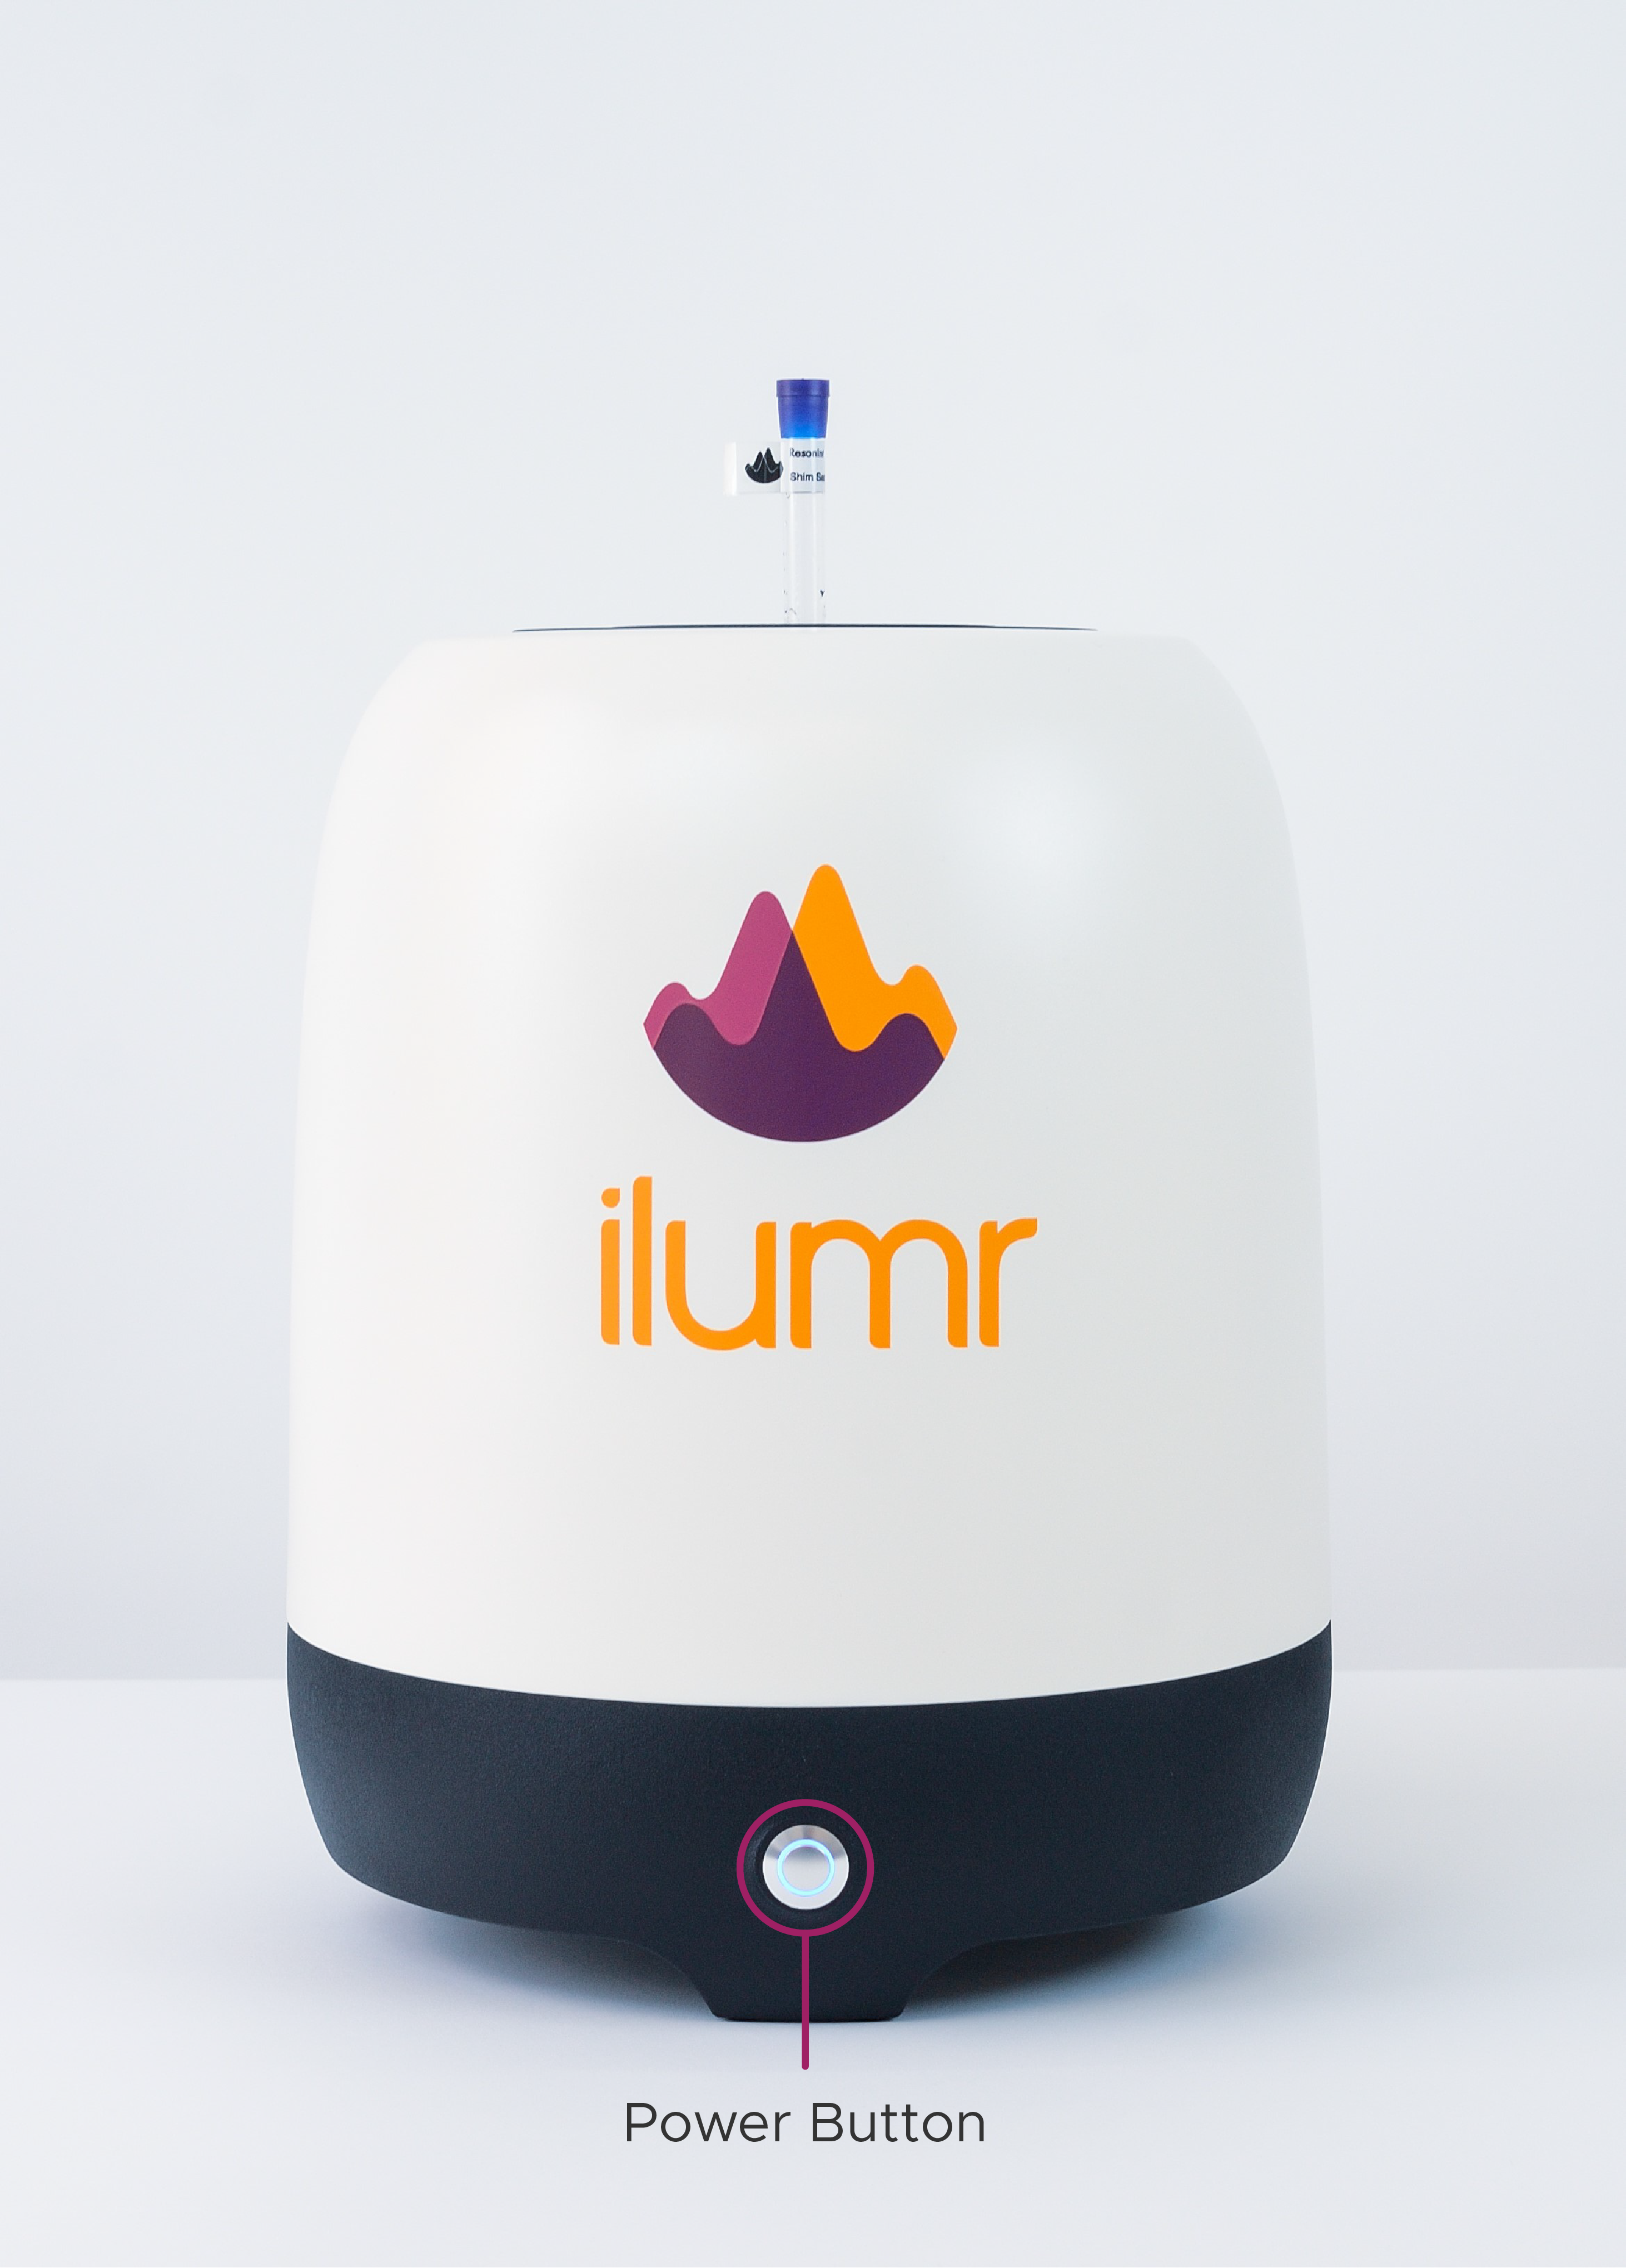
ilumr Front View
Back View
On the back of ilumr you will see four ports:
External Control/Trigger
Fuse
24V DC External Supply
Gigabit Ethernet
You will also see a sticker with your system’s serial number printed on it.
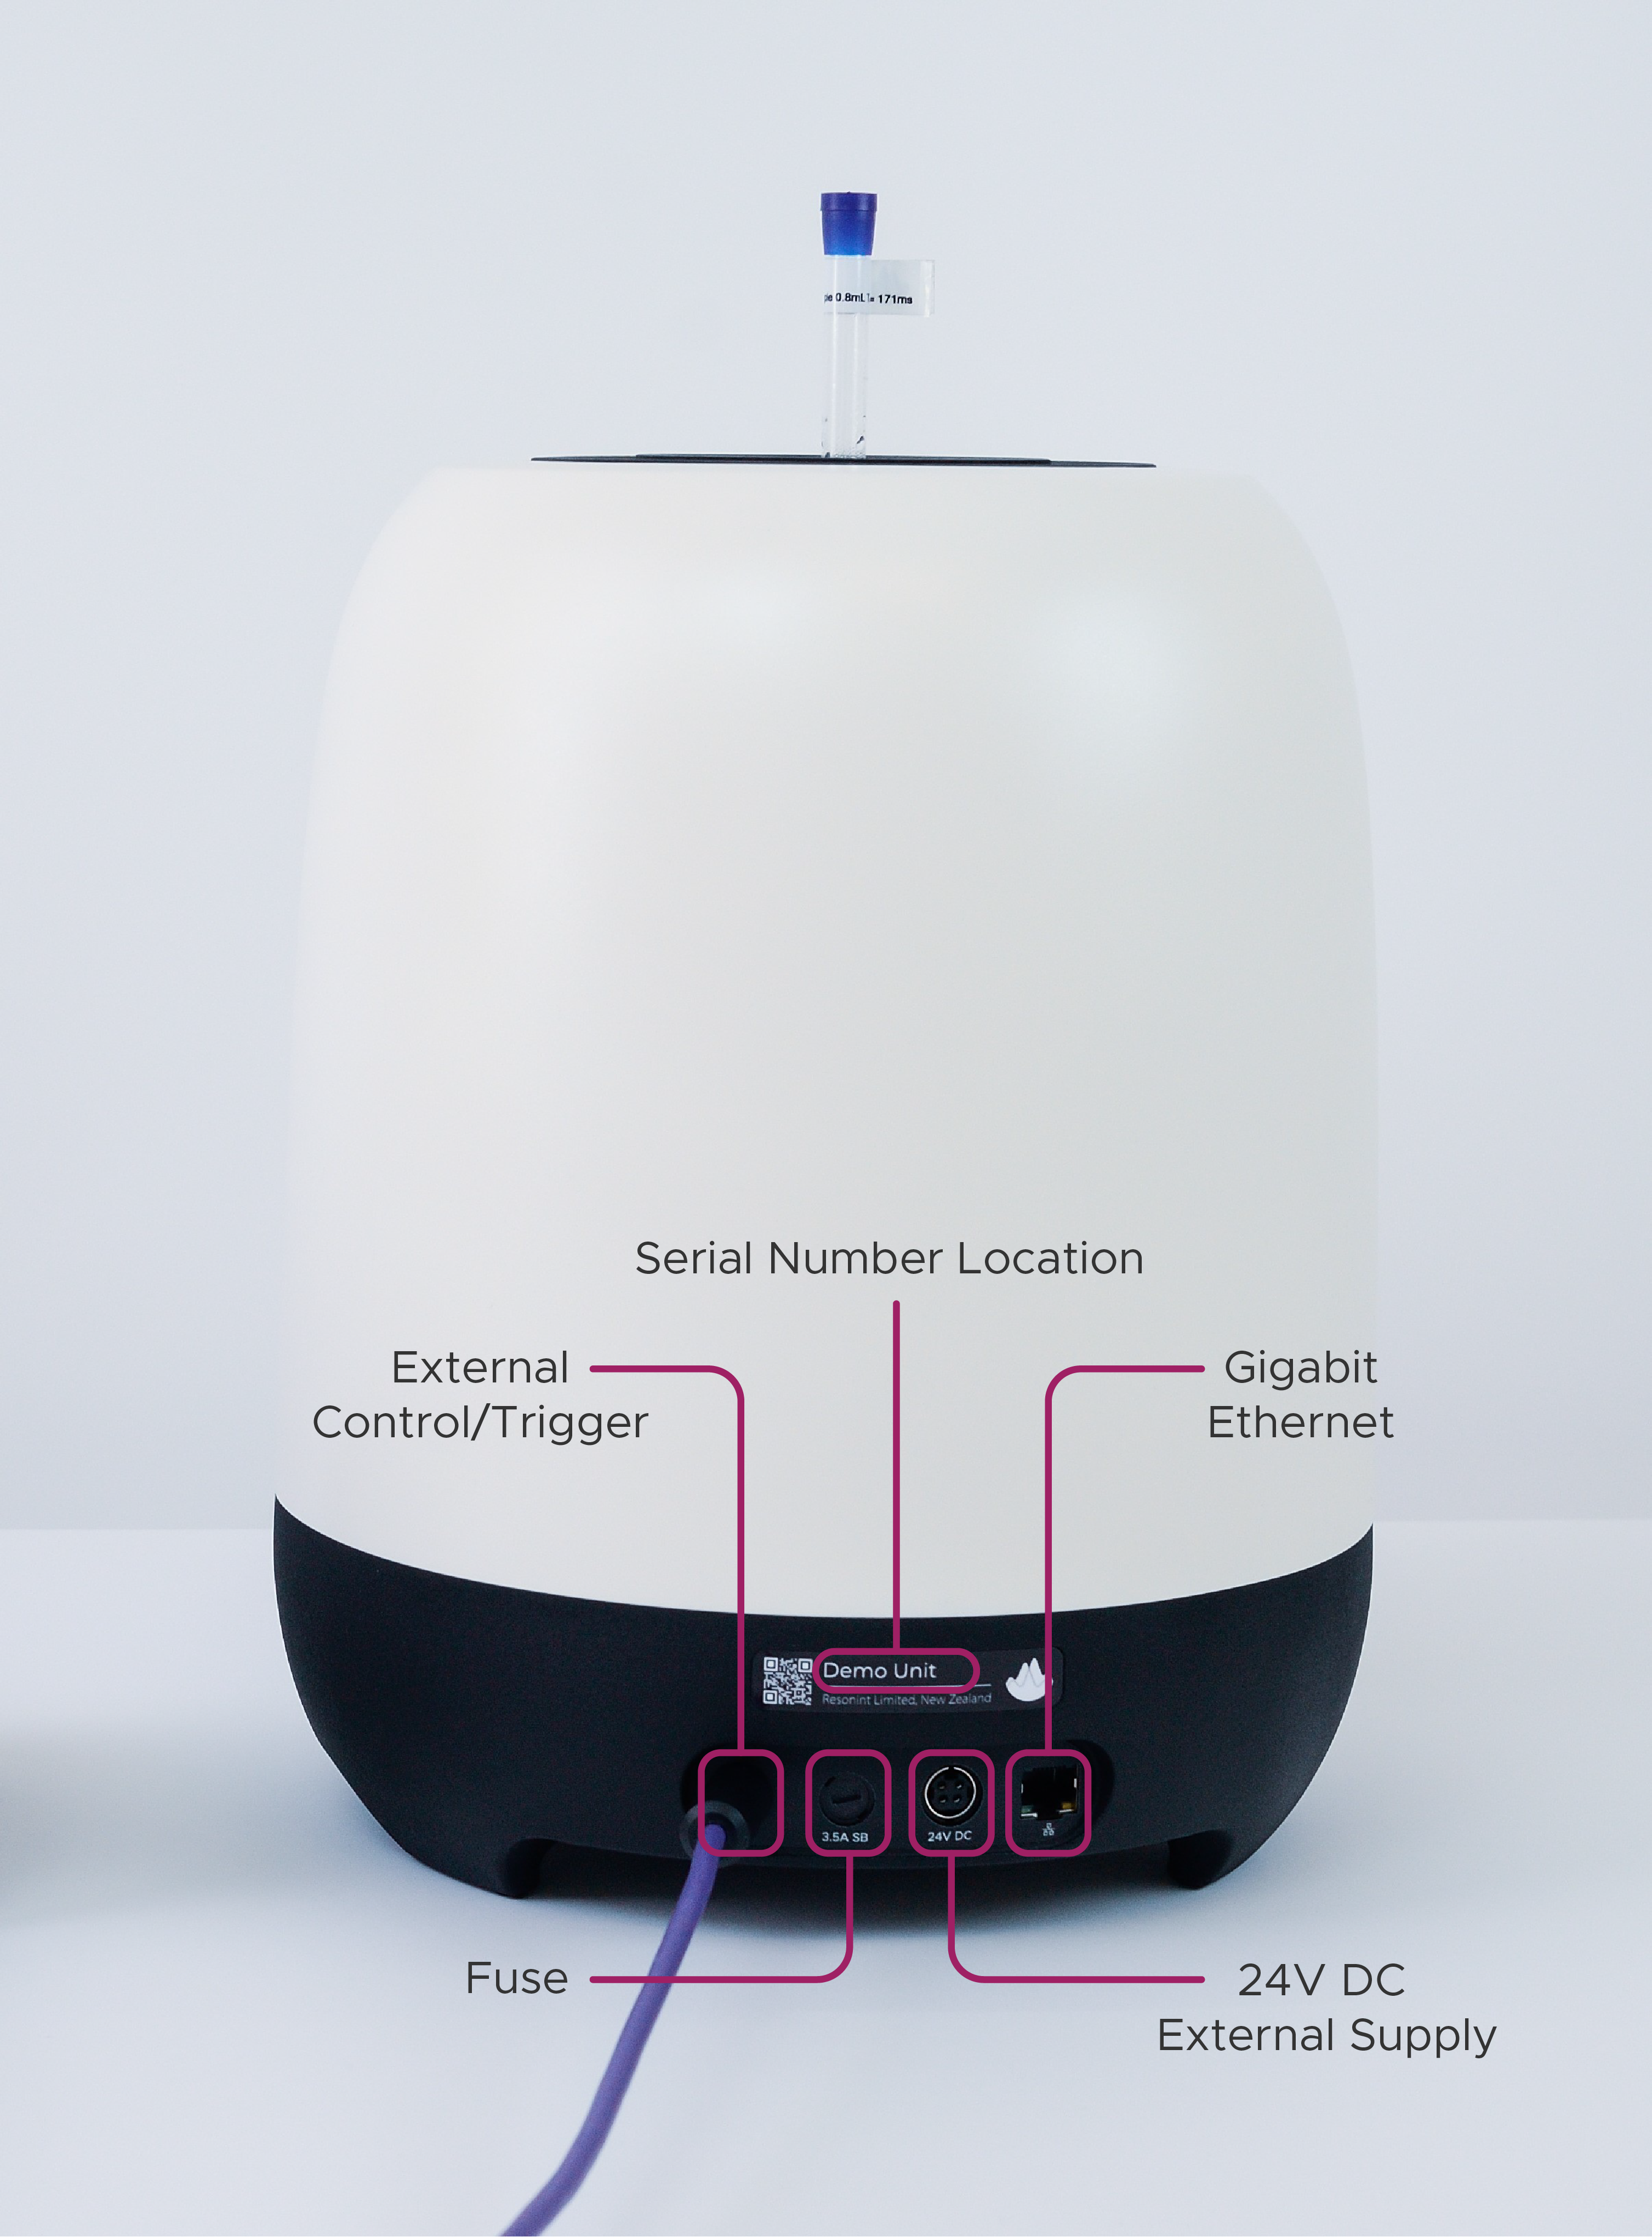
ilumr Back View
Note
ilumr has the capability to control other devices through its I/O interface. Please contact the Resonint team for a guide on how to set up and use this feature.
Sample Loading System
ilumr has a unique way of loading samples that is designed to position the sample in the homogenous part of the magnetic field.
The sample loading system has five parts:
Glass Test Tube (1)
Test Tube Lid (2)
Sample Grip (3)
Sample Holder (4)
Sample Depth Gauge (5)
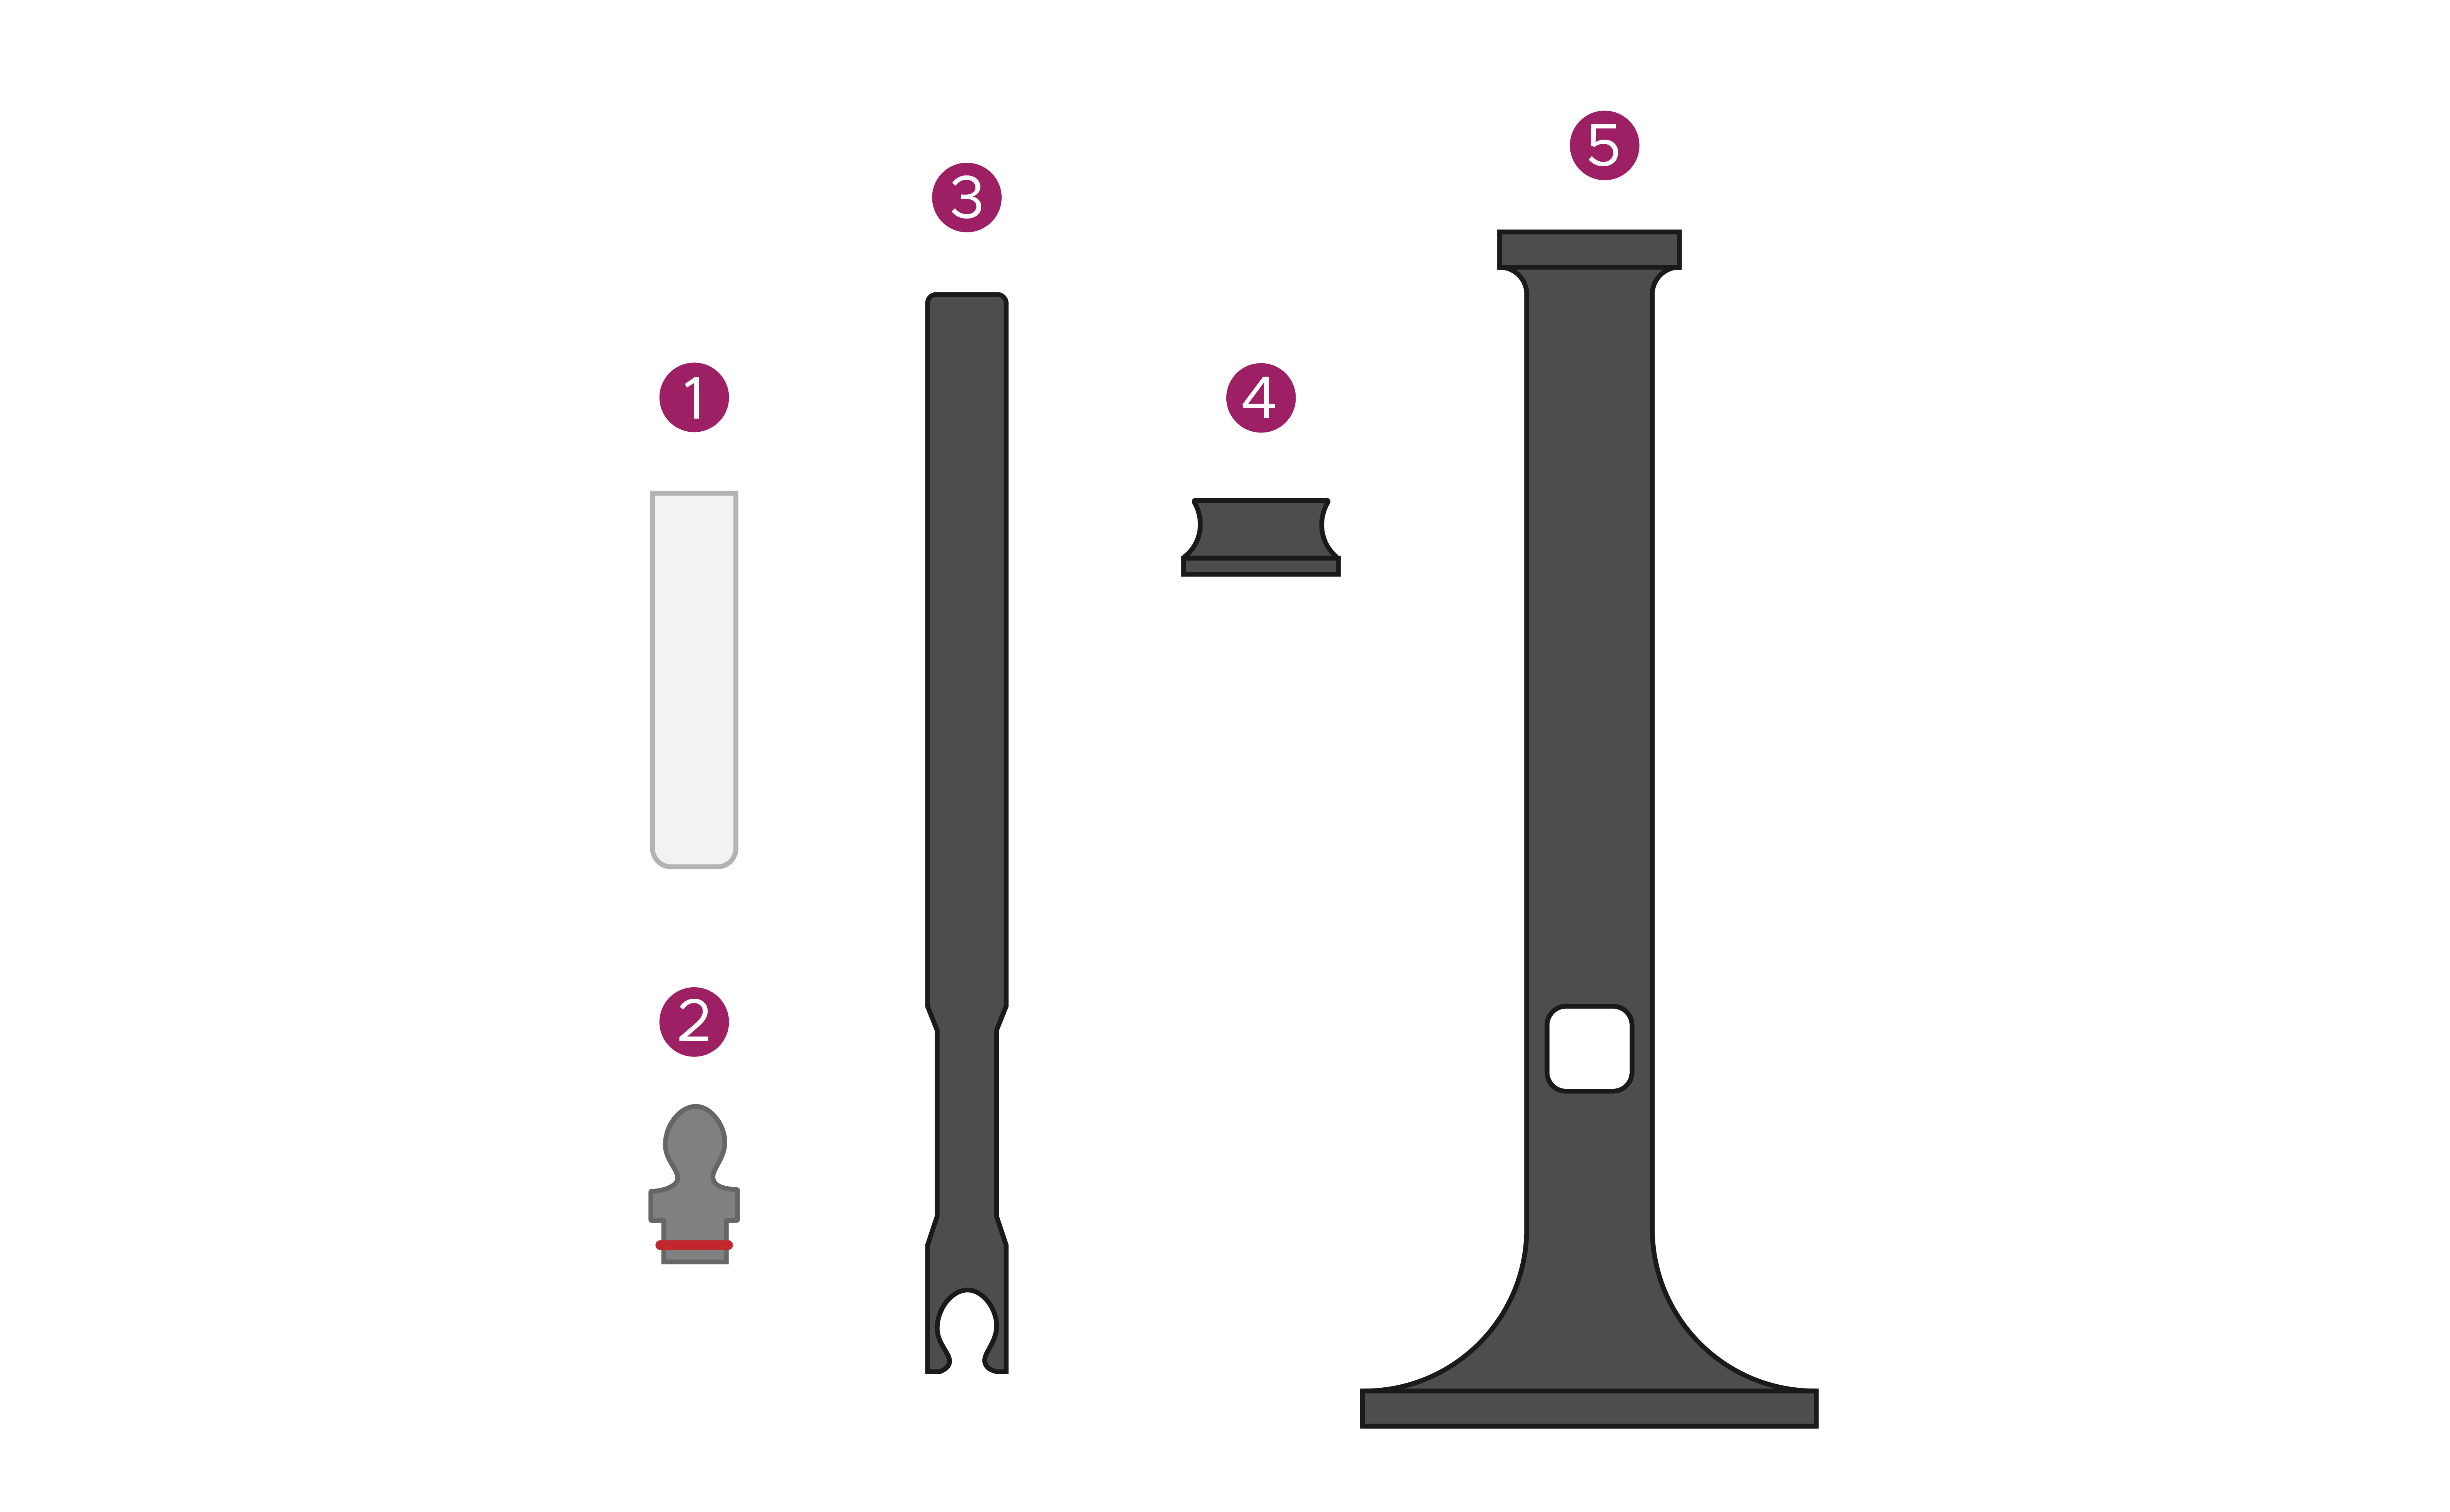
Sample Loading System
The sample gauge allows for easy positioning to ensure the sample, or portion of the sample, that you are imaging is centered within the system’s field of view.
To load a sample:
Place your chosen sample in one of the supplied glass tubes.
Fit a test tube lid onto the test tube.
Horizontally slide the sample grip onto the test tube lid - fitting the two puzzle pieces together.
Fit a sample holder onto the sample grip.
Place the sample into the depth gauge and adjust the sample holder’s vertical position to line the sample up with the depth gauge window.
Remove the sample from the depth gauge and place it into ilumr.
Loading an ilumr Sample
Attention
To prepare the system for setup and calibration, please place the supplied shim sample into ilumr. Ensure the entire sample is contained within the depth gauge window.